Jupyter Notebook 教程(三):多语言编程环境配置
前言
Jupyter Notebook 作为一个把代码、图像、注释、公式和作图集于一处,从而实现可读性分析的交互式笔记本工具,借助所谓的内核(Kernel)的概念,Jupyter Notebook 可以同时支持包括 python2、python3、R、Ruby 在内超过 50 多种不同编程环境。基于 Kernel,Jupyter Notebook 可以支持的编程语言可以参考列表。
目的
在 Jupyter Notebook 中实现 python2 与 python3 自由切换。
步骤
The idea here is to install multiple
ipythonkernels. Here are instructions for anaconda. If you are not using anaconda, I recently added instructions using pure virtualenvs.Anaconda 4.1.0
Since version 4.1.0, anaconda includes a special package
nb_conda_kernelsthat detects conda environments with notebook kernels and automatically registers them. This makes using a new python version as easy as creating new conda environments:
conda create -n py27 python=2.7 ipykernel
conda create -n py36 python=3.6 ipykernel
After a restart of jupyter notebook, the new kernels are available over the graphical interface. Please note that new packages have to be explicitly installed into the new enviroments. The Managing environments section in conda’s docs provides further information.
Manually registering kernels
Users who do not want to use nb_conda_kernels or still use older versions of anaconda can use the following steps to manually register ipython kernels.
configure the
python2.7environment:
conda create -n py27 python=2.7
source activate py27
conda install notebook ipykernel
ipython kernel install --user
Additionally you can pass the
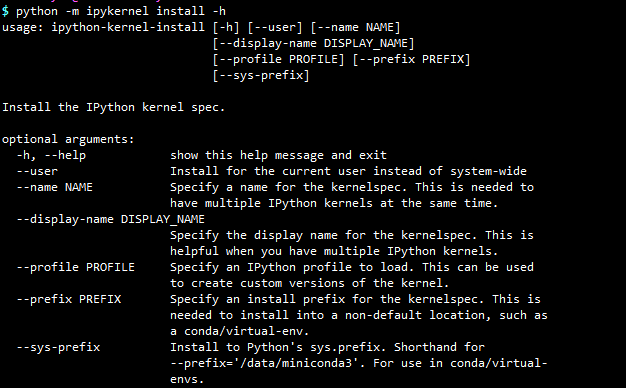
--nameand--display-nameoptions to ipython kernel install if you want to change the names of your kernels. Seeipython kernel install --helpfor more informations.
总结起来就是:
- 在 python2 和 python3 环境中分别安装 ipykernel。
- 手动为当前用户(–user),或者指定路径(–prefix)安装 IPython kernel spec。
需要注意的是:
- 其中
--user与--prefix不能同时使用。 --user,IPython kernel spec 默认安装到当前用户 \~/.local/share/jupyter/kernels 或者 \~/.ipython/kernels。- 不加
--user和--prefix,IPython kernel spec 默认安装到 /usr/local/share/jupyter/kernels 或者 /usr/share/jupyter/kernels。 - IPython kernel spec 安装可以使用
python -m ipykernel install,也可以使用ipython-kernel-install命令,两者是一样的。
实战
使用 --prefix 指定 IPython kernel spec 安装路径:
# python2 环境(默认)
$ python -m pip install ipykernel
$ python -m ipykernel install --prefix=/Bio/Anaconda2.5/

# python3 环境
$ /Bio/Anaconda2.5/envs/python3/bin/python -m pip install ipykernel
$ /Bio/Anaconda2.5/envs/python3/bin/python -m ipykernel install --prefix=/Bio/Anaconda2.5/ --name "python3"
也可以使用 conda 进行安装:
# python2 环境(root)
conda install -n root ipykernel
python -m ipykernel install --prefix=/path/to/install --name "python2"

# python3 环境
conda install -n python3 ipykernel
/path/to/python3 -m ipykernel install --prefix=/path/to/install --name "python3"
最后,jupyter-kernelspec list 检查安装好的 kernels,启动 jupyter notebook。
$ jupyter-kernelspec list
Available kernels:
  python2    /Bio/Anaconda2.5/share/jupyter/kernels/python2
  python3    /Bio/Anaconda2.5/share/jupyter/kernels/python3
- 在 python2 和 python3 环境中分别安装 ipykernel。
- 手动为当前用户(
--user),或者指定路径(--prefix)安装 IPython kernel spec。其中--user与--prefix不能同时使用。 - 使用
--user时,IPython kernel spec 默认安装到当前用户 \~/.local/share/jupyter/kernels 或者 \~/.ipython/kernels。 - 不加
--user和--prefix,IPython kernel spec 默认安装到 /usr/local/share/jupyter/kernels 或者 /usr/share/jupyter/kernels。
IPython kernel spec 安装可以使用 python -m ipykernel install ,也可以使用 ipython-kernel-install 命令,两者是一样的。