各个平台下 Perl 模块安装总结
从 1994 年 10 月 17 日发布的 Perl 5.000 起,Perl 增加了模块的概念,用来提供面向对象编程的能力。这是 Perl 语言发展史上的一个里程碑。此后,广大自由软件爱好者开发了大量功能强大、构思精巧的 Perl 模块,极大地扩展了 Perl 语言的功能。
CPAN,Comprehensive Perl Archive Network(https://www.cpan.org/) 是 Perl 模块最大的集散地,包含了现今公布的几乎所有的 perl 模块。CPAN 从 1995 年 10 月 26 日开始创建,截止 2019 年 4 月该网站已经囊括了超过 13,750 位作者编写的 180,202 个 Perl 模块,其镜像分布在全球在 257 台服务器上。
Perl 作为生物信息数据预处理、文本处理和格式转换中的一把瑞士军刀,其强大和重要性不言而喻。今天,我们在这里主要介绍一下各种平台下 perl 模块的安装方法。以安装 Bio::SeqIO 模块为例。
一、Linux 下安装 Perl 模块
Linux/Unix 下安装 Perl 模块有两种方法:手工安装和自动安装。
- 第一种方法是从 CPAN 上下载您需要的模块,手工编译、安装;
- 第二种方法是使用 CPAN 模块自动完成下载、编译、安装的全过程。
1.1 手工安装
# 从 CPAN(https://metacpan.org/)下载了 BioPerl 模块 1.7.5 版的压缩文件 BioPerl-1.7.5.tar.gz
# 假设放在/usr/local/src/下。
$ cd /usr/local/src

# 解压缩这个文件,这时会新建一个 BioPerl-1.7.5 的目录。
$ tar xvzf BioPerl-1.7.5.tar.gz

# 换到解压后的目录
$ cd BioPerl-1.7.5

# 生成 makefile,如果要指定模块的安装路径,需要添加 PREFIX=/path/to/install 路径
$ perl Makefile.PL (PREFIX=/home/shenweiyan/perl_modules)

# 生成模块
$ make

# 测试模块(这步可有可无):
$ make test

# 如果测试结果报告"all test ok",您就可以放心地安装编译好的模块了。
# 安装模块前,先要确保您对 perl5 安装目录有可写权限(通常以 su 命令获得),执行:
$ make install

# 现在,试试 Bio::SeqIO 模块吧。如果下面的命令没有给出任何输出,那就没问题。
$ perl -MBio::SeqIO -e1

# 如果指定 PREFIX 安装路径,模块安装完成后,需要把模块安装的新路径添加到 PERL5LIB 环境变量
$ export PERL5LIB=$PERL5LIB:/home/shenweiyan/perl_modules/lib/site_perl  //或者把该行内容添加到 ~/.bashrc
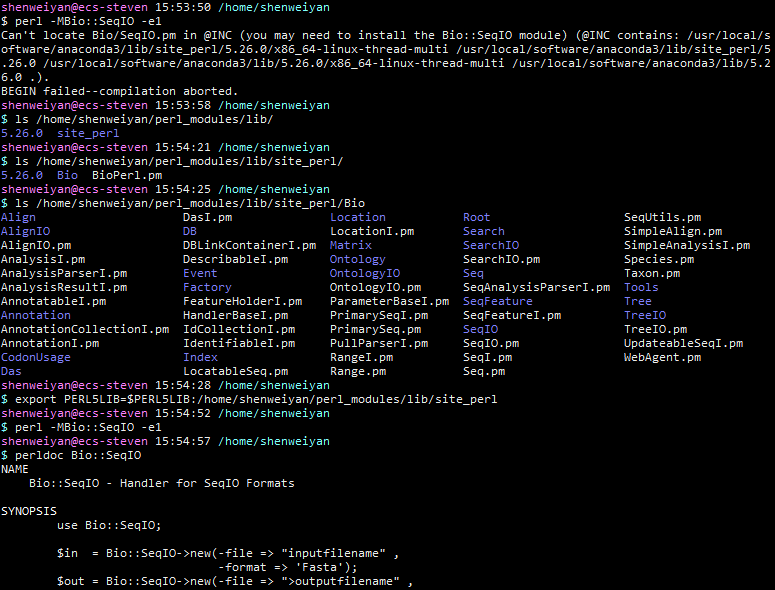
上述步骤适合于 Linux/Unix 下绝大多数的 Perl 模块。可能还有少数模块的安装方法略有差别,所以最好先看看安装目录里的 README 或 INSTALL。
有的时候如果是 Build.PL 的需要以下安装步骤:(需要 Module::Build 模块支持)
$ perl Build.PL
$ ./Build
$ ./Build test
$ ./Build install
1.2 自动安装
Linux/Unix 下自动安装 Perl 模块主要有两种方法,一是利用 perl -MCPAN -e 'install 模块' 安装;二是直接使用 cpan 的命令执行安装。这两种方法都是通过与 CPAN 进行交互,然后执行对应模块的自动安装,本质上都是一样的。
1.2.1 使用 CPAN 模块
自动安装方法一
- 执行
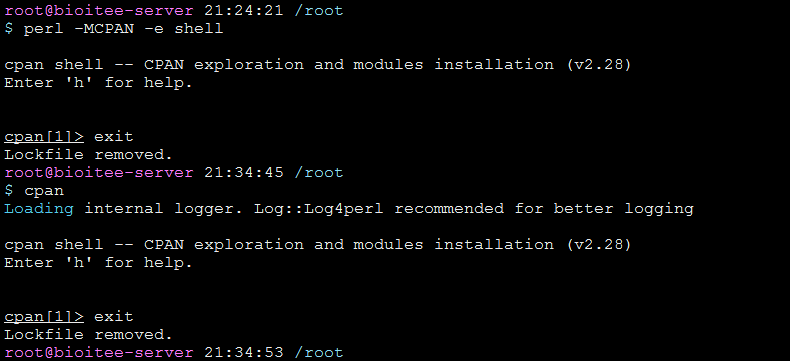
perl -MCPAN -e shell命令,或者直接运行cpan命令,都可以进入 cpan 交互模式。
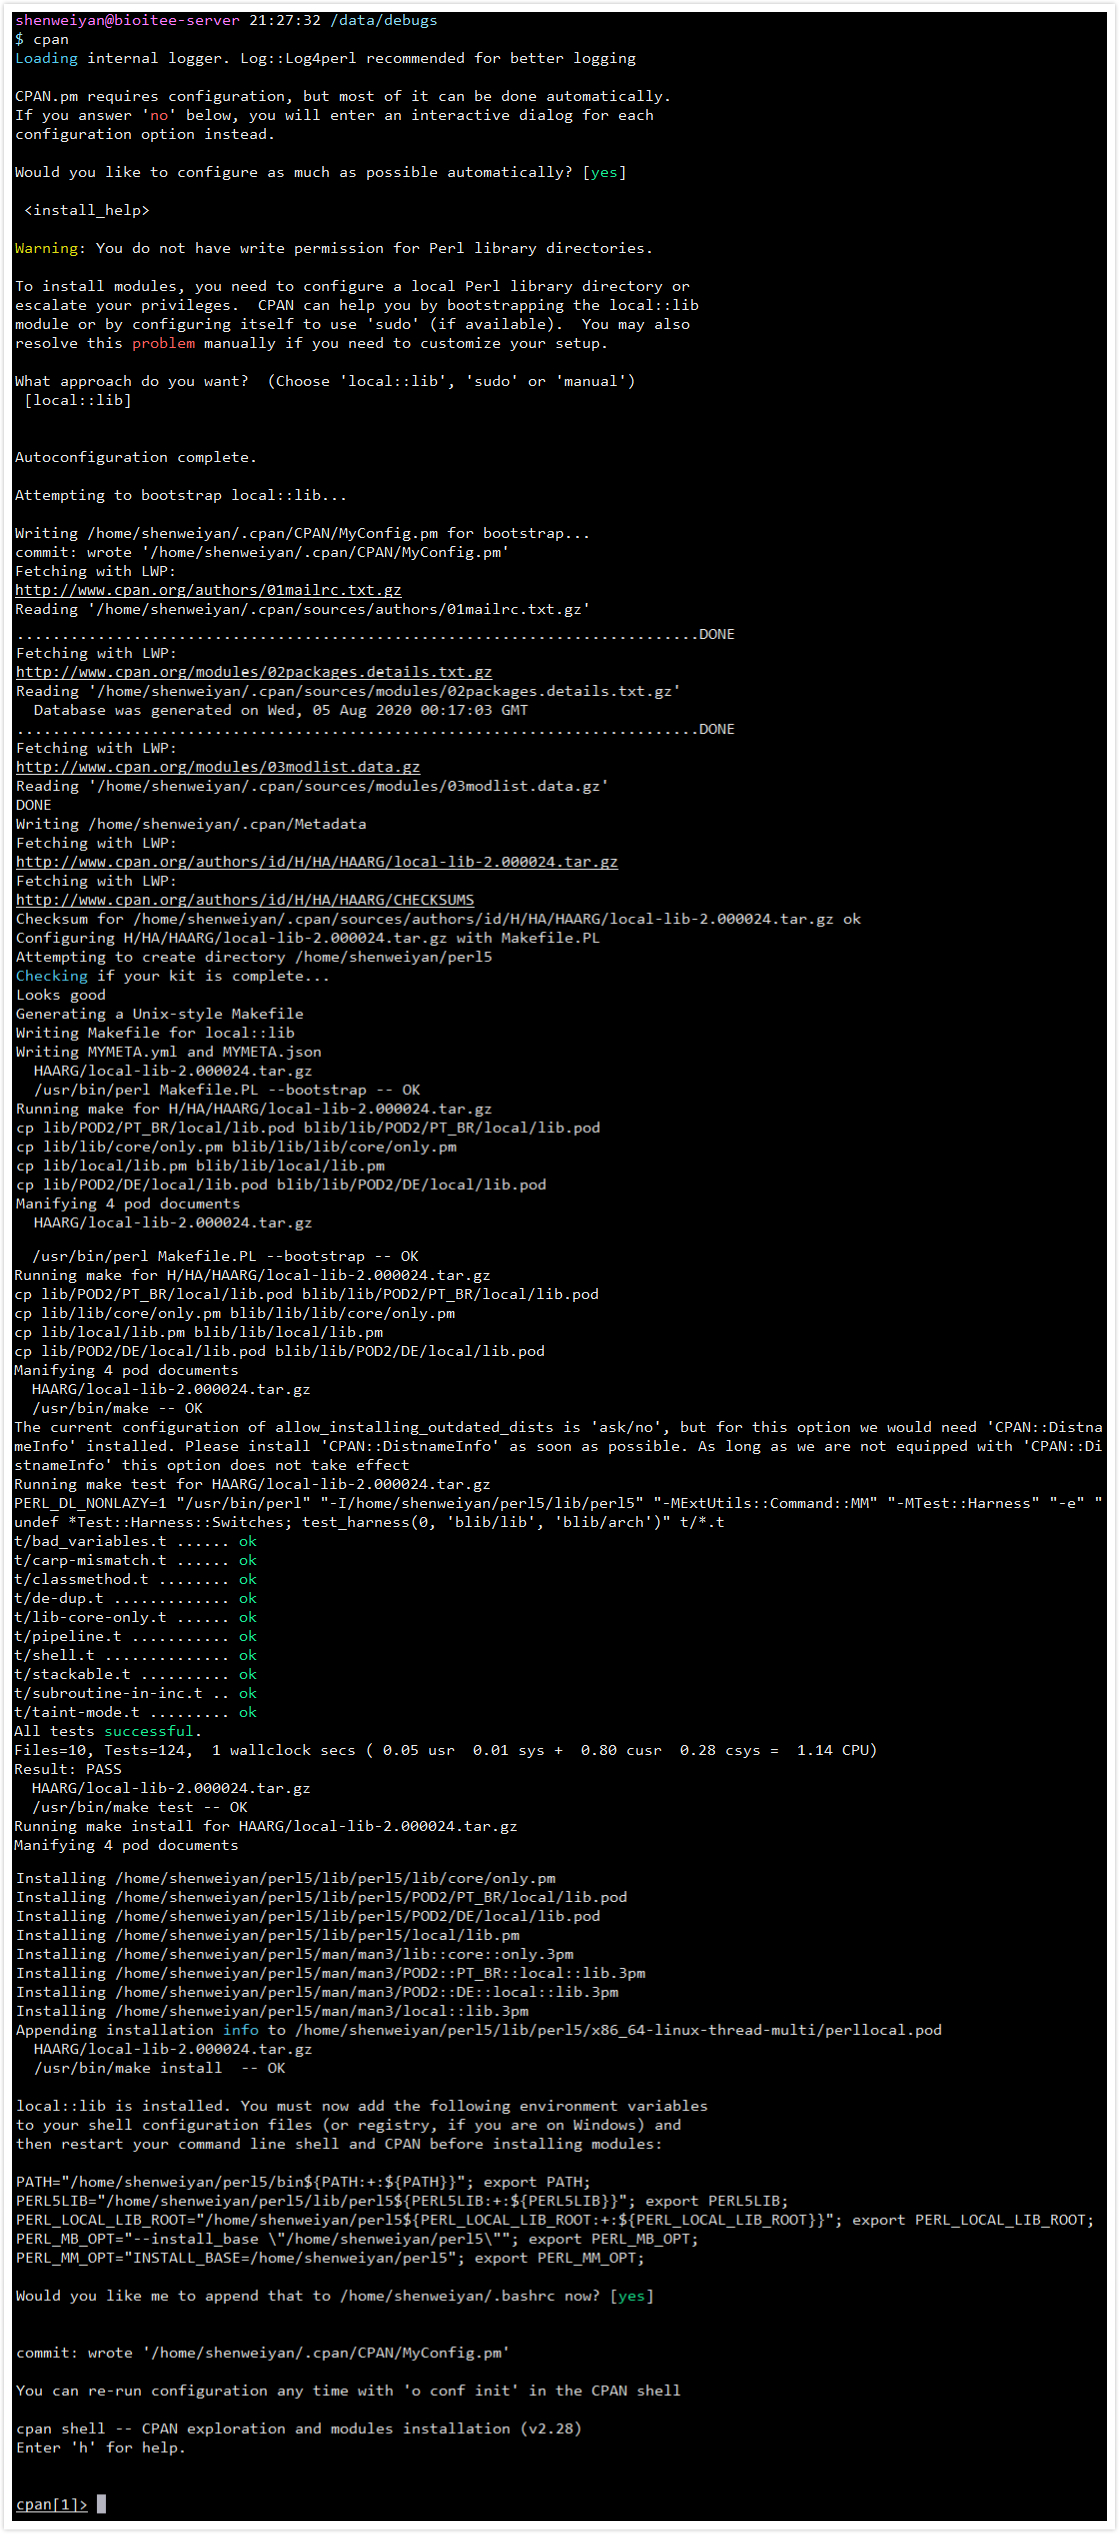
- 安装前需要先联上网,有无 root 权限均可。对于非 root 用户,Perl 提供了 ‘local::lib‘、’sudo’ or ‘manual’ 三种使用 CPAN 模块自动安装的方式,初次运行 CPAN 时需要用户自行进行选择设置,默认为 ‘local::lib‘。
- 初次运行 CPAN 时需要做一些设置,如果我们的机器是直接与因特网相联,那么一路回车就行了。
- 常用 cpan 命令:
# 获得帮助
cpan> help

# 列出 CPAN 上所有模块的列表
cpan>m

# 安装模块,自动完成 Bio::SeqIO 模块从下载到安装的全过程。
cpan> install Bio::SeqIO

# 查看当前 CPAN 使用的镜像站点
cpan[3]> o conf urllist

# 查看当前 CPAN 的配置信息
cpan[2]> o conf

# 退出
cpan> quit
- 切换 cpan 的自动安装模式,从 local::lib 切换成 sudo(参考:这里)
如果你使用 su root 的方式切换到 root,然后执行 cpan 进入界面执行模块,对应的模块会依然默认使用 local::lib 的方式安装到 su root 切换前所对应用户的 \~/perl5/lib/perl5 目录下。
针对这种情况,你就需要使用 su - root 的方式切换到 root,这样 cpan 进入界面执行模块安装才会自动切换到 sudo 模式,把模块自动安装到默认 Perl 对应的 lib 目录。
You should run the cpan command as your normal user. You have two choices:
- Install modules into a directory under your home dir. local::lib will help you set that up.
- Configure cpan to use sudo during the install phase. You do that by starting the cpan shell and typing:
o conf make_install_make_command 'sudo make'
o conf mbuild_install_build_command 'sudo ./Build'
o conf commit
The first line configures MakeMaker to use sudo. The second line does the same for Module::Build. The third line saves the changes.
自动安装方法二
可以使用命令行的方式执行安装。
cpan -i 模块名

例如:cpan -i CGI
1.2.3 修改 CPAN 镜像源
安装 perl 下的很多模块文件时,比较快捷的方法是使用 cpan 工具。默认 cpan shell 使用的是 cpan.org 的源,在国内使用的话速度会非常的慢。如果更换为国内的如阿里或网易等公司的源的话,速度会明显提高。
CPAN (The Comprehensive Perl Archive Network) 镜像源的配置文件为 MyConfig.pm(一般位于 ~/.cpan/CPAN/MyConfig.pm),可使用包管理脚本 cpan 进行修改。关于 CPAN 镜像使用帮助,可以参考:清华大学开源软件镜像站 - CPAN 镜像使用帮助,以下为部分摘录。
初次使用
如果 MyConfig.pm 配置文件不存在,在命令行中执行:
# 自动生成 MyConfig.pm
## 对于 Perl 5.36 (或 CPAN 2.29)及以上,使用如下命令
PERL_MM_USE_DEFAULT=1 perl -MCPAN -e 'CPAN::HandleConfig->edit("pushy_https", 0); CPAN::HandleConfig->edit("urllist", "unshift", "https://mirrors.tuna.tsinghua.edu.cn/CPAN/"); mkmyconfig'
## 对于较久版本,使用如下命令
PERL_MM_USE_DEFAULT=1 perl -MCPAN -e 'CPAN::HandleConfig->edit("urllist", "unshift", "https://mirrors.tuna.tsinghua.edu.cn/CPAN/"); mkmyconfig'

# 或不使用默认配置,手动确认各个配置选项
perl -MCPAN -e 'mkmyconfig'
已有配置
- 在命令行中执行
cpan命令,或者通过perl -MCPAN -e shell命令进入 CPAN 交互模式查看当前源配置。
cpan[1]> o conf
$CPAN::Config options from /root/.cpan/CPAN/MyConfig.pm:
    commit             [Commit changes to disk]
    defaults           [Reload defaults from disk]
    help               [Short help about 'o conf' usage]
    init               [Interactive setting of all options]

    applypatch         []
    auto_commit        [0]
    build_cache        [100]
    build_dir          [/root/.cpan/build]
    build_dir_reuse    [0]
    ......
# 列出当前的镜像设置
cpan[2]> o conf urllist
    urllist
        0 [http://www.cpan.org/]
Type 'o conf' to view all configuration items
- 增加源或移出源并提交
cpan[1]> o conf urllist
    urllist
        0 [http://www.cpan.org/]
Type 'o conf' to view all configuration items

# 将清华大学 CPAN 镜像加入镜像列表首位
# 注:若已在列表中则可跳过本步直接退出,修改列表不会执行自动去重
cpan[2]> o conf urllist unshift https://mirrors.tuna.tsinghua.edu.cn/CPAN/

# 或将清华大学 CPAN 镜像加入镜像列表末尾
# 注:本命令和上面的命令执行一个即可,修改列表不会执行自动去重
cpan[3]> o conf urllist push https://mirrors.tuna.tsinghua.edu.cn/CPAN/
Please use 'o conf commit' to make the config permanent!

# 或清空镜像列表,仅保留本站
cpan[4]> o conf urllist https://mirrors.tuna.tsinghua.edu.cn/CPAN/

# Perl 5.36 及以上用户需要关闭 pushy_https 以使用镜像站
cpan[5]> o conf pushy_https 0

# 保存修改后的配置至 MyConfig.pm
cpan[6]> o conf commit
commit: wrote '/root/.cpan/CPAN/MyConfig.pm'

cpan[7]> o conf urllist
    urllist
        0 [http://www.cpan.org/]
        1 [https://mirrors.tuna.tsinghua.edu.cn/CPAN/]
Type 'o conf' to view all configuration items

# 退出 cpan shell
cpan[8]> quit
-
移出一个源或者多个源可以使用
pop函数,如下:cpan[9]> o conf urllist pop https://mirrors.aliyun.com/CPAN/ cpan[10]> o conf urllist pop http://www.cpan.org/ https://mirrors.aliyun.com/CPAN/ -
也可以一次增加多个源:
cpan[4]> o conf urllist ftp://mirrors.sohu.com/CPAN/ http://mirrors.163.com/cpan/
- 或者直接修改
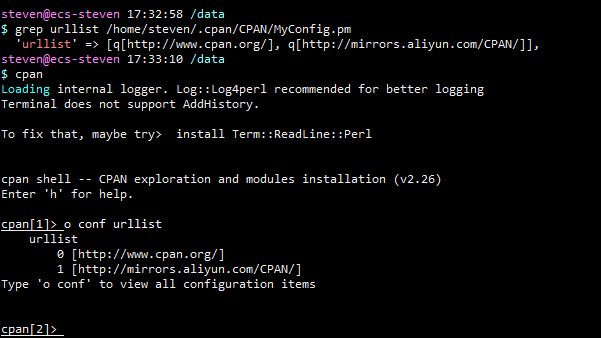
~/.cpan/CPAN/MyConfig.pm文件的 urllist:
$ grep urllist /home/steven/.cpan/CPAN/MyConfig.pm
  'urllist' => [q[http://www.cpan.org/], q[http://mirrors.aliyun.com/CPAN/]],

$ cpan
Loading internal logger. Log::Log4perl recommended for better logging
Terminal does not support AddHistory.

To fix that, maybe try>  install Term::ReadLine::Perl


cpan shell -- CPAN exploration and modules installation (v2.26)
Enter 'h' for help.

cpan[1]> o conf urllist
    urllist
        0 [http://www.cpan.org/]
        1 [http://mirrors.aliyun.com/CPAN/]
Type 'o conf' to view all configuration items
- 如果对当前的当前所有的 cpan shell 的配置不满意,也可以通过命令重新初始化该文件,如下:
cpan> o conf init
1.2.4 使用 cpanm 命令安装
除了 cpan 以外,Perl 的模块安装还可以通过 cpanm 命令进行安装,而要获取 cpanm 命令我们需要先安装 Perl 的 App::cpanminus 模块:
[root@ecs-steven data]# cpan
Loading internal logger. Log::Log4perl recommended for better logging
Terminal does not support AddHistory.

To fix that, maybe try>  install Term::ReadLine::Perl


cpan shell -- CPAN exploration and modules installation (v2.26)
Enter 'h' for help.

cpan[14]> install App::cpanminus
Running install for module 'App::cpanminus'
Fetching with HTTP::Tiny:
http://www.cpan.org/authors/id/M/MI/MIYAGAWA/App-cpanminus-1.7044.tar.gz

  CPAN: checksum security checks disabled because Digest::SHA not installed.
  Please consider installing the Digest::SHA module.

Scanning cache /root/.cpan/build for sizes

......
App::cpanminus 模块安装完成后, cpanm 命令就会自动安装到对应 Perl 所在的目录(如果用的是 /bin/perl , cpanm 将默认安装到 /usr/local/bin/cpanm )。
使用 cpanm 安装 Perl 模块,命令后直接接模块名称即可,如:
$ sudo cpanm CGI::Session
$ sudo cpanm Template
注: 如果不是 root 权限,cpanm 也一样能用。它会将模块下载安装到用户的根目录(~)下。
为了加快 cpanm 下载速度, 可以指定使用镜像,并只从镜像下载。如下:
$ sudo cpanm --mirror http://mirrors.163.com/cpan --mirror-only CGI::Session
二、windows 下 Perl 模块安装
在开始介绍 windows 下 Perl 模块安装前,我们先来了解一些关于 make、gmake、nmake、dmake 等编译工具。
Make 是一种自动化构建工具,用于从源码自动生成可执行程序和库(通常借助于 makefile 来推导出目标程序);Make 有多个版本,如 Unix/Linux 下 的 GNU Make(之所以有 gmake,是因为在别的平台上 make 一般被占用,GNU make 只好叫 gmake 了)、Windows 下的 Microsoft nmake 等。dmake 则是一个适用于 Linux、Solaris、Win32 以及其他平台的跨平台的命令行编译工具,除此之外,跨平台编译工具中还有一个大名鼎鼎的 cmake。
关于 Make 的详细介绍,具体可参考:Wikipedia: Make (Software)。
dmake 工具:https://metacpan.org/release/dmake,具体安装方法请自行谷歌(dmake 貌似是 cpan 环境配置好就有了在 “C:\Perl\site\bin” 下)。
nmake 是 Microsoft Visual Studio 中的附带命令,需要安装 VS;安装 VS 后,nmake.exe 出现在 C:\Program Files (x86)\Microsoft Visual Studio 9\VC\bin 目录下(bin 文件夹的位置根据每个人系统不同,找到自己的安装位置,bin 文件夹中包含 nmake 即可)。如果 VS 安装过程中,没有注册 VS 的环境变量,因此直接在 cmd 的 DOC 中输入 nmake 就会出现:“‘nmake’ 不是内部或者外部命令,也不是可运行的程序或批处理文件” 报错。
使用 nmake 的方法有两种:
- 打开 VS 自带的命令行 “
Visual Studio 2008 Command Prompt“,然后在该命令行中使用 nmake; - 将路径 “
C:\Program Files (x86)\Microsoft Visual Studio 9\VC\bin” 设置到环境变量中去,然后在 DOS 命令行中使用 nmake。
2.1 解压编译手动安装
windows 下手动 Perl 模块方法跟 Linux 类似。都需要解压后执行:
perl makefile.pl
nmake/dmake
nmake/dmake test
nmake/dmake install
2.2 cpan 自动安装
安装前需要对 cpan 配置,cpan 需要安装其他的模块 dmake 和 MinGw gcc compiler。完成后,进入 cpan 交互界面安装(参考上面的 linux cpan 自动安装)。
2.3 PPM 自动安装
如果使用 ActivePerl,可以使用 PPM(Perl Package Manager) 来安装,使用 PPM GUI 或 PPM Commandline。PPM commandline 实例如下:
- add correct repositories.
c:\perl\bin\ppm repo add http://theoryx5.uwinnipeg.ca/ppms/package.lst
c:\perl\bin\ppm repo add http://www.roth.net/perl/packages/
通过设置不同的 repositories 可以加速部分 Perl 模块的下载,我们也可以通过 ppm 命令查看可用的 repositories list:
# Use the command ppm repo list to list all installed PPM repositories in ActivePerl 5.10 through 5.14.
PS C:\> ppm repo list
┌────┬───────┬────────────────────────────────┐
│ id │ pkgs  │ name                           │
├────┼───────┼────────────────────────────────┤
│  1 │ 13334 │ ActiveState Package Repository │
│  2 │   294 │ Theoryx                        │
└────┴───────┴────────────────────────────────┘
 (2 enabled repositories)
PS C:\>

# The command ppm repo desc #, where "#" is the number of the repository (in the order it was added), will display information about that repository:
PS C:\> ppm repo desc 2
Id: 2
Name: Theoryx
URL: http://cpan.uwinnipeg.ca/PPMPackages/14xx/
Enabled: yes
Last-Status: 200 OK
Last-Access: 9 seconds ago
Refresh-In: 1 day
- install the packages
c:\perl\bin\ppm install Carp-Assert

c:\perl\bin\ppm install Log-Log4perl

c:\perl\bin\ppm install YAML-Syck
更多关于 ActivePerl 的文档与资料,可以参考:http://docs.activestate.com/。
三、其他异常处理
3.1 not contain a Line-Count heade
使用 cpan 安装 PERL 模块的时候,遇到下面的问题导致无法安装 Perl 模块,具体错误信息如下:
cpan> install Getopt::Long
.........
...........
Going to read /root/.cpan/sources/modules/02packages.details.txt.gz
Warning: Your /root/.cpan/sources/modules/02packages.details.txt.gz does not contain a Line-Count header.
Please check the validity of the index file by comparing it to more
than one CPAN mirror. I'll continue but problems seem likely to
happen.
Warning: Your /root/.cpan/sources/modules/02packages.details.txt.gz does not contain a Last-Updated header.
原因是由于 cpan 模块中的数据损坏造成。解决方法如下:
- 删除用户主目录下面的 cpan 目录:
rm -rf ~/.cpan
# 也可以直接删除提示异常的 02packages.details.txt.gz
# rm -rf /root/.cpan/sources/modules/02packages.details.txt.gz
- 执行
perl -MCPAN -e shell命令,输入:
cpan[1]> reload index
- 安装此模块:
cpan[1]> install Bundle::CPAN
- 最后执行
cpan[1]> reload CPAN
这样即可正常通过命令行 install MODULES 模块的正常安装了。
四、参考资料
- itybku,《修改 CPAN mirror 的默认源》,运维之路的博客
- 生信菜鸟团,《perl 模块安装大全》,WordPress 博客
- xianguang,《Perl 模块安装》,博客园
- luckcy,《解决 perl 模块无法安装的问题》,51CTO 博客